Building Bitzer part 4.
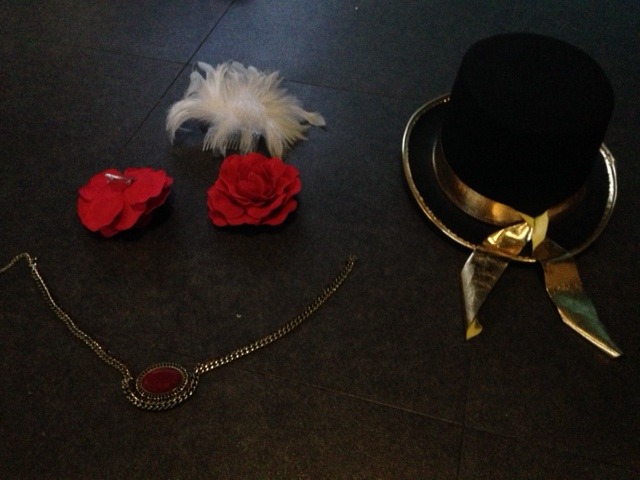
I found the hat once upon a Halloween in a dollar shop and thought “Ooo! This looks like fun to play with!”
And so I am.
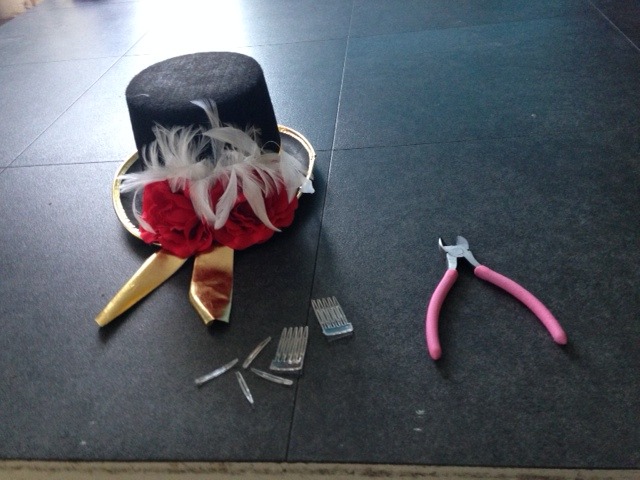
Not shown is the really tacky rectangular buckle that, thanks to the simple fact that it’s plastic, we cut off with side-snips before I could document it. If I find a similar, pre-buggered hat, I shall photograph it for educational purposes.
The white feathery thing was a hair comb, purchased the last time feather accessories were so popular that they turned up in dollar shops [hands up if you’re spotting a pattern with my accessory haunts, children]
The flowers are combination hair clips and brooches that I got for $5 each at the local K-mart. The necklace was at the bargain bin at Target, owing to the fact that some of its gems are missing.
I’m going to reduce the necklace to its central gem-and-chain setup, fix the missing gems, and affix a brooch backing once I obtain one. I’ll then use the resulting frankenstein jewellery to fancy up the front of the hat.
The method used for the arrangement on the back was a succession of jiggery-pokery as I fooled with places to pin the brooch part of the flowers [You can tell I just snipped the comb into next-to-nothing and just kept the bit that was glued to the feathers.
Once the flowers were in place, it was just a matter of pushing the feathers in until the flowers kept them in place. It’s surprisingly stable. I know, because I held the hat upside-down and attempted to shake the feathers loose :D And since I couldn’t do that, no random gust of wind should disturb them.
Also not shown, yet: an extra length of ribbon that I’m going to add to the original ribbons. It will require partial disassembly of the existing rig and some clever insertion with a brass safety-pin. As well as some special goo to prevent later fraying.
The hat, and the stuff that's going on the hat.
Back of hat accomplished, plus tool of destruction and fallout.